Happy Holidays everyone, Lyn here again with a bit of Christmas inspiration...a cute little Winter Birdhouse Charm made with Amazing Casting Resin.
Using Amazing Casting Resin, Alumilite Dye(Red),
some Acrylic Paint, Snow Tex(available at most craft stores) and some
beads and a Christmas Tree Charm I created these tiny Birdhouse Charms
just in time for the Holidays.
How cute are they? They'll be perfect Holiday gifts for loved ones!
What gifts will you create this season with Amazing Casting Products?
Will that's about it for this post...Till Next Time!
As always you can find my work on my blog LynzCraftz , on YouTube LynzCraftz , as well as FaceBook LynzCraftz .
Creating Art and Jewelry in an Old World Style using Polymer Clay, Resin and Found Items by Lyn Gill
Pages
▼
Pages
▼
Wednesday, August 29, 2018
"Whale Song" Resin Pour Wall Art
I first started with a polymer clay whale that I sculpted from Super Sculpey(baked according to package directions) I left it flat on the back so I could glue it down to my mold form & then I used Amazing Mold Rubber to create the mold. It's a 1-2-1 ratio so it's easy to mix & use. After the Amazing Mold Rubber cured & I removed the original it was time to pour some clear blue resin whales using Amazing Clear Cast & Alumilite Dye I mixed up & let them cure. Aren't they cute?
Then using a wooden canvas I had purchased, I painted it with some acrylic paints. Just a basic underwater type background which will get mostly cover up.
The final step was to mix just a touch(the tip of my pallet knife) of the Alumilite Metalic Powder in Pearl to another batch of Amazing Clear Cast Resin & pour over the entire piece whales & all.
After letting it cure overnight the results are well...Amazing! You can see the sparkle from the tiny bit of Pearl that I added to the final layer of resin...so pretty! A little bit of work but well worth it in the end.
What end of Summer projects do you have planned?
As always you can find my work on my blog LynzCraftz , on YouTube LynzCraftz , as well as FaceBook LynzCraftz .
Well that's the end for now...Till Next Time!
Nugget Ring
Hello everyone, Lyn here again! This time with a project with Amazing Clear Cast Resin and Polyform Products the makers of Sculpey clays and products Premo Accents...an easy Nugget Ring!
I started with a mix of Silver and Gold Premo Accents and the Sculpey Flexible Texture sheet "Edgy" and embossed the clay.
Then using my Sculpey Clay Blade I cut out a few rough pieces, I'll refine them in later steps.
Now I always have mold on my desk whenever I pour Amazing Clear Cast Resin so I have something on hand whenever I mix just a bit too much. So I have a lot of these Nuggets in various colors. I created the mold from a piece of Pyrite using Amazing Mold Putty.
Now I further shaped my cut pieces of Premo Accents to fit around the small Circle Cutter from the Premo Sculpey Graduated Cutter Set Circles. It was the perfect size to use for a ring mold.
Now using the 2 strips of clay I added a Bezel around the Resin Nugget.
Then using some Bake n Bond by Sculpey I adhered the Nugget Bezel to the Ring Band and baked...275F for an hour(for strength and flexibility). The Amazing Clear Cast Resin holds up well to these temps.
Once cool I added a wash of Black Acrylic Paint to the band.
I then added a coat of Varathane Varnish to the band and finished with a light rub of Inka Gold by VivaDecor.
What can you create using Amazing Casting Products and Polyform Products?
Well that's it for this week on the Amazing Casting Product blog...Till Next Time!
As always you can find my work on my blog LynzCraftz , on YouTube LynzCraftz , as well as FaceBook LynzCraftz .
Just a little Hiccup
After a short respite I'm back. I don't like to talk about myself much or my health matters so lets just say after a brief hospital stay, a little physical therapy and a bit of convalescing I'm back.
So let's get started...with just a few pendants I finished during my missing time...
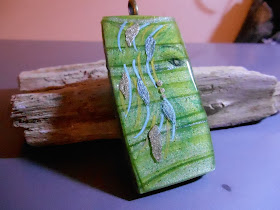
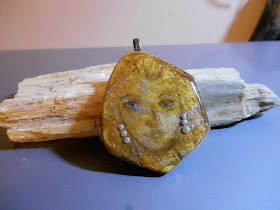
These are a few of the Colored Pencil Transfer onto Polymer Clay pieces I did onto a striped Pearlized Polymer Clay background and the topped with domed resin. My own original Artwork, a little Acrylic Paint along with some Metallic Markers here and there.
Well these are just a few of the pendants, more will follow. In time I'll have more tutorials too.
That's it for today... Till Next Time!
As always you can find my work on my blog LynzCraftz , on YouTube LynzCraftz , as well as FaceBook LynzCraftz .


