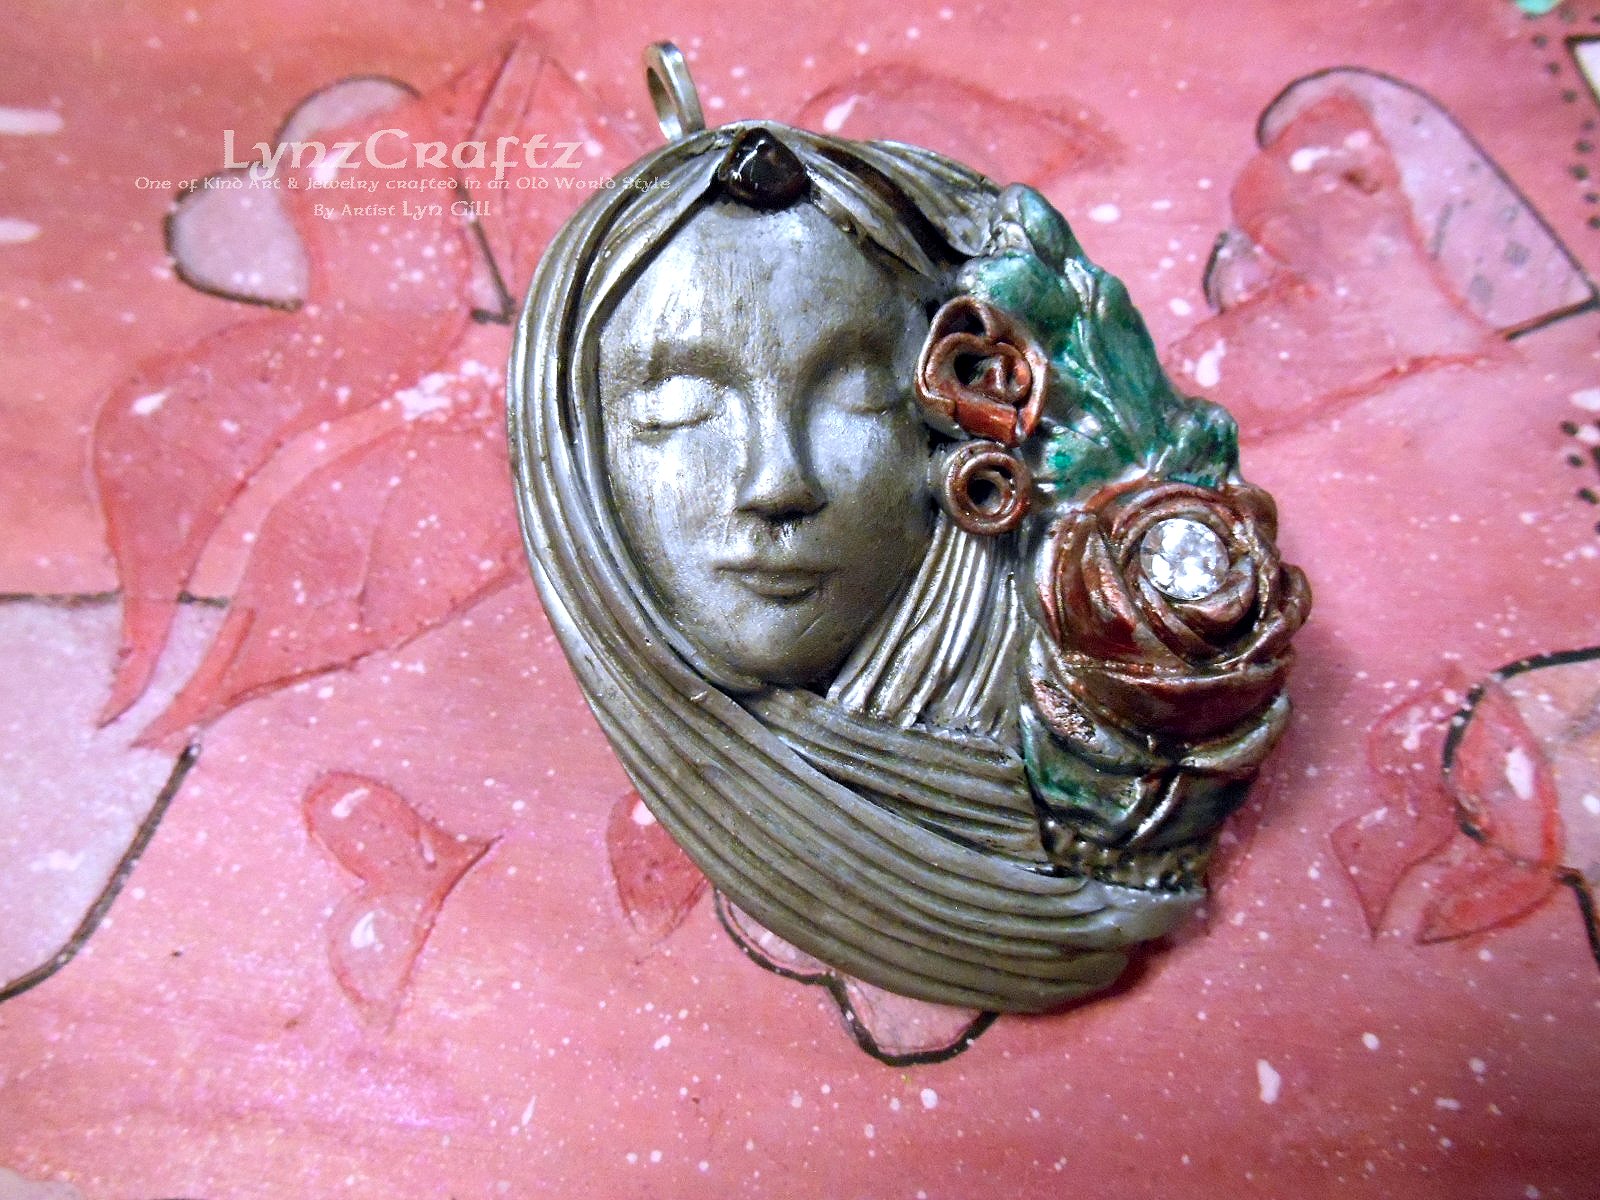
I've been doing quite a bit of my work lately combining Resin & Polymer Clay. After some trial & error I've really come to enjoy this process. It slows me down considerably & that's a good thing. It actually gives me time to work on more projects at one time, which is the way I prefer to work. For this post I only have a few projects to share...
First is the lovely milky white face with a resin geode that I molded from an Amethyst geode piece from my collection. It has iridescent faux snowflakes for some sparkle in the resin. Her earrings & crown are Amethyst nuggets.
Next is my Favorite...because of the beach/ocean theme of it. The sea turtle is resin with some gold metal flakes & she has a crown of turquoise.
This pendant has the Swellegant Sapphire Sky Patina on the brass metal coating & the same geode mold resin piece with iridescent flakes. Her face is framed by 2 feathers in silver metal coating with the darkening patina. I always enjoy working with the Swellegant line...awesome product!
On this final pendant I tried something a little different, a bit of a softer look. This one is all polymer clay but still just as beautiful. The roses are from a mold & the finish is Swellegant Silver metal coating with darkening patine & several of the dye oxide colors. She has a Garnet crown & a beautiful CZ in her rose bouquet.
These are more of the type of project I want to bring for the new year. Along with some more mixed media, Altered boxes & bottles, maybe even some art journaling! Thank you so much for spending time with me today during this busy time of year & join me tomorrow for a DT project for Amazing Casting Products...Till Next Time!
Creating Art and Jewelry in an Old World Style using Polymer Clay, Resin and Found Items by Lyn Gill
Thursday, December 10, 2015
Monday, November 23, 2015
Amazing Casting Products: #Cre8time Play in #Polymer Waves of Blue... by Lyn...
Hi Lyn Gill
here again with a project I've had on my mind for a while. The thought
of 2 or more resin disks floating together for a pendant... now how to
accomplish it? I started this project off with a simple design, created
my pieces to mold from polymer clay and got to it!
Using some clay cutters I created this simple design of a hammered metal look for the outer ring and lined waves for the inner disk, then molded them with Amazing Mold Putty {CLICK HERE to view mixing/preparation}.
I dusted the inside of the mold with the Alumilite Gun Metal Metallic Powder and mixed a small amount in with my resin mix. I used Amazing Casting Resin for this part {CLICK HERE to view mixing/preparation.
I love the shimmery look of this part... LOL.
I mixed up the Amazing Clear Cast Resin with some of the Blue Alumilite Dye and poured it into the outer mold {CLICK HERE to view mixing/preparation}. With the last little bit of resin in the cup, I poured a wave of blue onto the inner disk. I waited until it was a little thicker before pouring it. Then I let these set overnight.
After some sanding and cleanup here's the result – a super fun and interesting pendant! Maybe a little Summery, but I'm always dreaming of Summer... LOL.

What a mix Amazing Casting Products carries to bring your imagination to life!
Thank you so much for joining me today.
You can check out more of my work on my blog.
Happy Thanksgiving!
As always I'm on http://lynzcraftz.blogspot.com/ and other social media – my YouTube Channel at LynzCraftz and on my Facebook Page LynzCraftz.
Happy Thanksgiving!
As always I'm on http://lynzcraftz.blogspot.com/ and other social media – my YouTube Channel at LynzCraftz and on my Facebook Page LynzCraftz.
• • • • • • • • • • • •
Don't forget to subscribe to our blog on the right side bar:
Twitter at AmazingCasting | Facebook at AmazingMoldPutty | YouTube at AmazingMoldPutty
Friday, November 20, 2015
Fall Leaves & Faux Leather
| Fall Leaves & Faux Leather |
It's a short posting this week as we are all getting ready to celebrate the upcoming Thanksgiving Holiday so I want to wish each & every one the Happiest of Thanksgivings & to say how much you all mean to me.
Thank you & Happy Holidays!...Till Next Time!
Friday, November 6, 2015
Altered Bottles Fall Table Decoration Tutorial
Oh it's a two-fer today...2 posts in one day...lol. I figured I better get busy because here in Texas Fall is very short. 2 weeks ago it was still Summer & I have a feeling Winter is right around the corner.
I took some plastic vitamin bottles, altered them & created some table decor for my table. Just some gesso, hot glue gun detail, some acrylic paint & some fabric leaves is all you'll need to create these fun altered bottles.
Just in time for Thanksgiving! Thanks so much for stopping by today...Till Next Time!
The Whispy Face
I did some resculpting on my face mold recently & made a mold of it using Amazing Mold Putty.
I absolutely love the results! Using Premo by Sculpey I made 2 pendants using the mold with some added details for the hair & leaves blowing in the wind.
These 2 pendants will be available in my etsy shop early next week so stop on by if your interested! Thanks for spending a few minutes today with me...Till Next Time!
I absolutely love the results! Using Premo by Sculpey I made 2 pendants using the mold with some added details for the hair & leaves blowing in the wind.
These 2 pendants will be available in my etsy shop early next week so stop on by if your interested! Thanks for spending a few minutes today with me...Till Next Time!
Thursday, October 29, 2015
Halloween Polymer clay & resin Tryptic Frame Decoration
Another super fun project I created using Amazing Clear Cast Resin & Polymer Clay. I created this Tryptic Frame from polymer clay using an image I painted in my Art Journal & then I layered on some resin with glitter embedded in it for a spooky Halloween look.
| Image from my Art Journal |
Then I added it to a layer of polymer clay cut slightly larger than the taped image...I left a little bit of tape showing around the edge just to create a seal.
I then created a decorative border out of polymer clay & added that to the frame & baked.
Then I created the side panels also out of polymer clay.
I added some detail to represent bottles & tubes for a Mad Scientist Lab effect, some mica powders add just the right look.
After baking I added the resin with some glitter just to complete the look.
I really like the way it turned out & it will be the perfect little touch on my Halloween table. I've really enjoyed creating this piece & the Art Journal page was just the right touch for this spooky frame!
Thank you so much for stopping by...Till Next Time!
Wednesday, October 28, 2015
Resin what to create with the molds I've made DIY
I think it's clear to see all the fun you can create with these Amazing products! This is just the tip of the iceberg! I've had so much fun just playing with these few molds that I made...the wolf, fox & bear face...a rock background mold & leaf mold. With just a few added details from clay, paint or embossing powder the sky is the limit! So open your mind up to the possibilities & stay tuned because I'll have much more to come!
Till Next Time!
Subscribe to:
Posts (Atom)