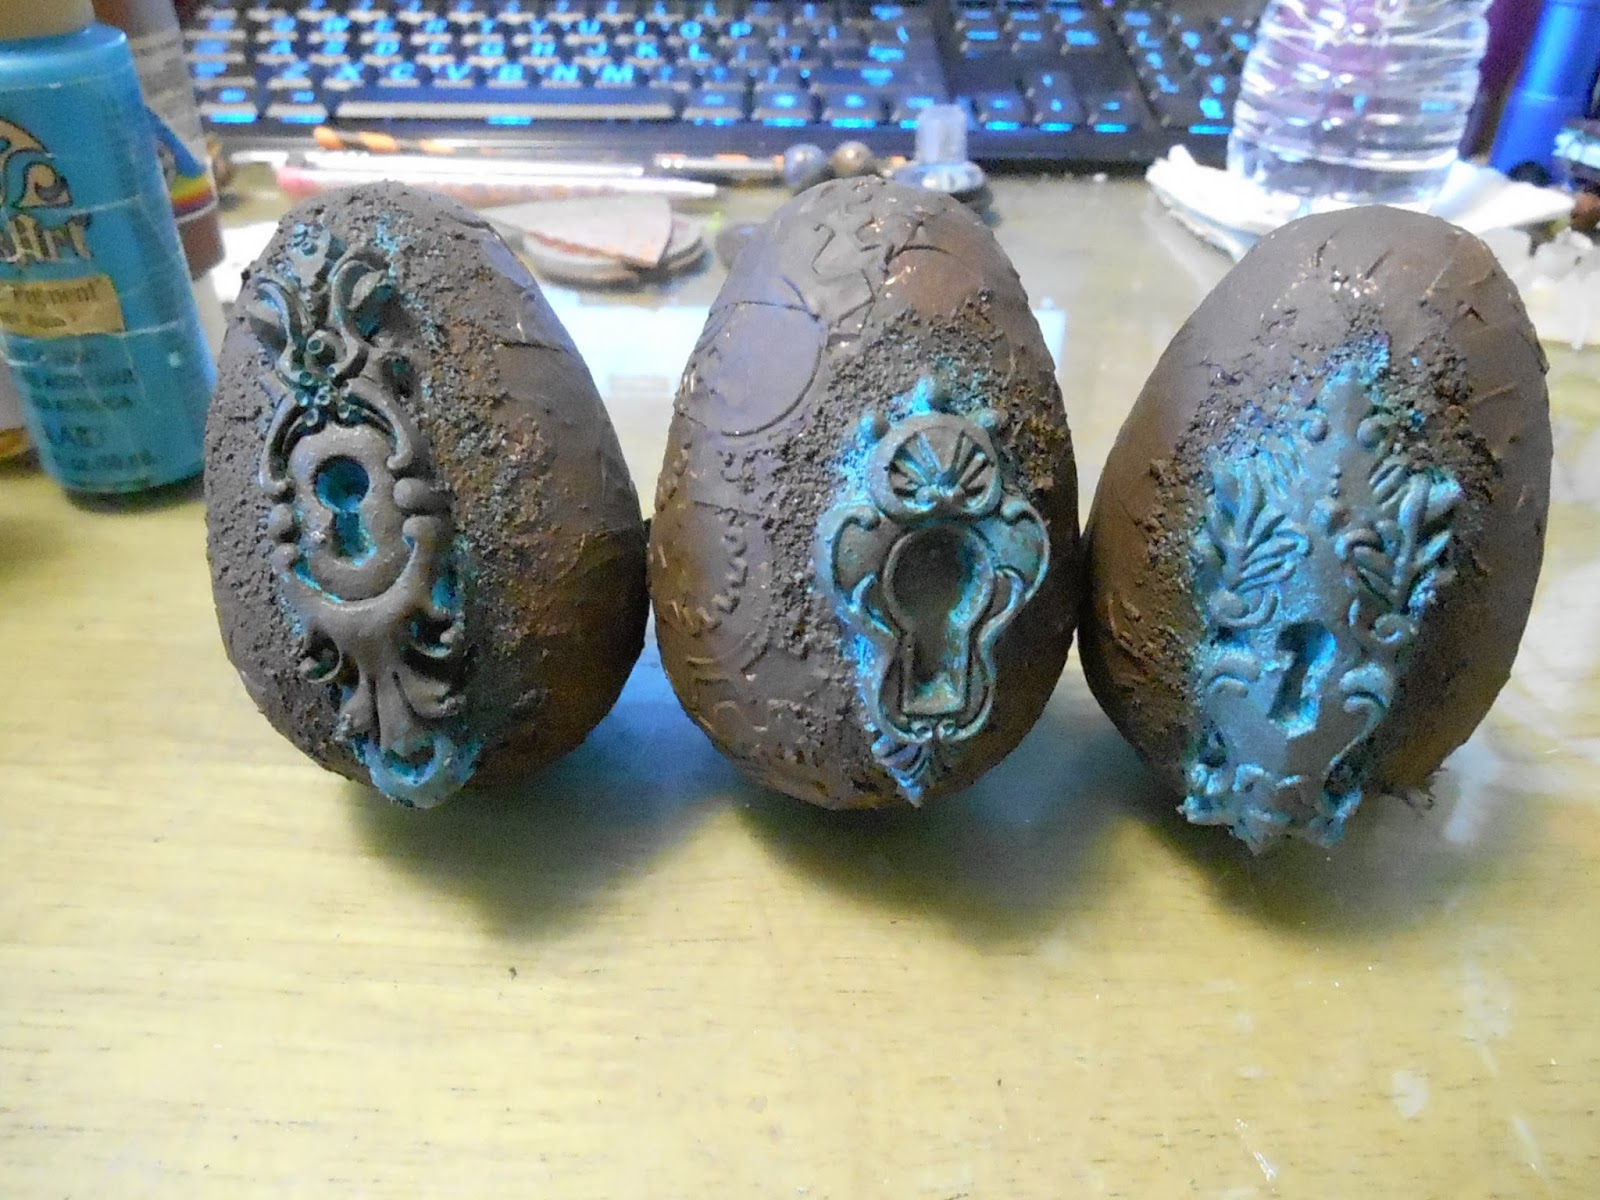
Hello everyone I know it's been a while but I'm back and this time with an Easter Egg project!
First I started with 2 coats of White Gesso on the Eggs stippled on with a Stencil Brush and let that dry.
Then I added some Foil Duct Tape that I ran through my Big Shot with an Embossing Folder and cut into small squares.
I used a different Embossing Folder for each Egg to add some variation.
Then I added a few resin pieces from my stash, some IOD Molded pieces from the Keyhole mold and a few others.
Then I began adding Acrylic Paint in 4 colors FolkArt... 481 Aqua first on the embellishments. Then some Americana Raw Umber to the rest of the Eggs and just a bit to the embellishments.
I followed that with some Delta Ceramcoat in Burnt Sienna randomly painted and just a touch of Apple Barrel Antique Gold which is more of an Ocher color than a true Metallic Gold.
These were just the acrylic paint I had on hand so use any brand you have to simulate the rust.
Now, I'm aware that Rust doesn't Patina and Vise Versa but I looked at it more like these were once pretty Turquoise Easter Eggs that got lost, buried and rusted. I finished them off with just a bit of the DecoArt Metallic Lustre in Rich Espresso and behold...Patina & Rust Easter Eggs!
So that's it for this week on the blog...Till Next Time!
As always you can find my work on my blog LynzCraftz , on YouTube LynzCraftz , as well as FaceBook LynzCraftz .
Creating Art and Jewelry in an Old World Style using Polymer Clay, Resin and Found Items by Lyn Gill
Tuesday, April 3, 2018
Labels:Arts & Crafts, polymer clay,Mixed Media,
aluminum tape,
mixed media,
molds,
pastic eggs,
resin,
rust effect paste
Thursday, February 15, 2018
Like Honey to the Bee Valentine! Crown Canvas
Hi everyone, Lyn here again with Amazing Casting Products DT and this time I've got a really cute project to share! It's a 5"x6" Crown shaped chipboard "canvas" for lack of a better term.
Now first I started off with this vintage Chalkware Salt Shaker that I picked up at a thrift store a few years ago, cute isn't he? Well I needed him to be flat on the back and light enough to use on the project so out came the Amazing Mold Putty. I quickly molded him making sure the Amazing Mold Putty covered him at least half way up the sides and then layed him down on the table to flatten the back of the putty so I could pour him "level". Once cure I removed the salt shaker from the mold and then mixed some Amazing Casting Resin and filled the mold and once that cured I de-molded it.
Then I needed some Bees which I had made for a previous project, again using the Amazing Casting Resin I poured and cured a couple of the bees.
Using a Honeycomb Stencil and some Modeling Paste I added some texture to the background. Then I decided on the placement of the elements for my design.
I then glued down the elements and added some Graphite Texture Paste around them and around the edges and let it all dry.
Then I covered the entire piece with some Gesso to give a uniform surface to paint on.
So then I painted the entire piece with some yellow acrylic paint followed by some orange acrylic paint and then spritzed the entire piece with some water and let it run down the "canvas". I finished it off with a little spray with some pearl shimmer and some Metallic Luster in the Sliver Spark color.
Now for the finish...I mixed up some Amazing Clear Cast with a bit of Alumitite Dye(yellow with the tiniest touch of orange) and let it set in the mixing cup for roughly an hour to thicken up(I needed to to be thick and not runny for this step) I placed "drips" of this "honey" in some strategic places and the tilted the "canvas" at an angle so the "honey" would "drip". You need the Amazing Clear Cast to be thick in order for it not to run off your piece.
Cute isn't it? I think so...what will you make for your Valentine?
Well that all for this post...Till Next Time!
As always you can find my work on my blog LynzCraftz , on YouTube LynzCraftz , as well as FaceBook LynzCraftz .
Labels:Arts & Crafts, polymer clay,Mixed Media,
acrylic paint,
mixed media,
molds,
resin
Monday, February 12, 2018
Underwater Treasure Box Inspiration
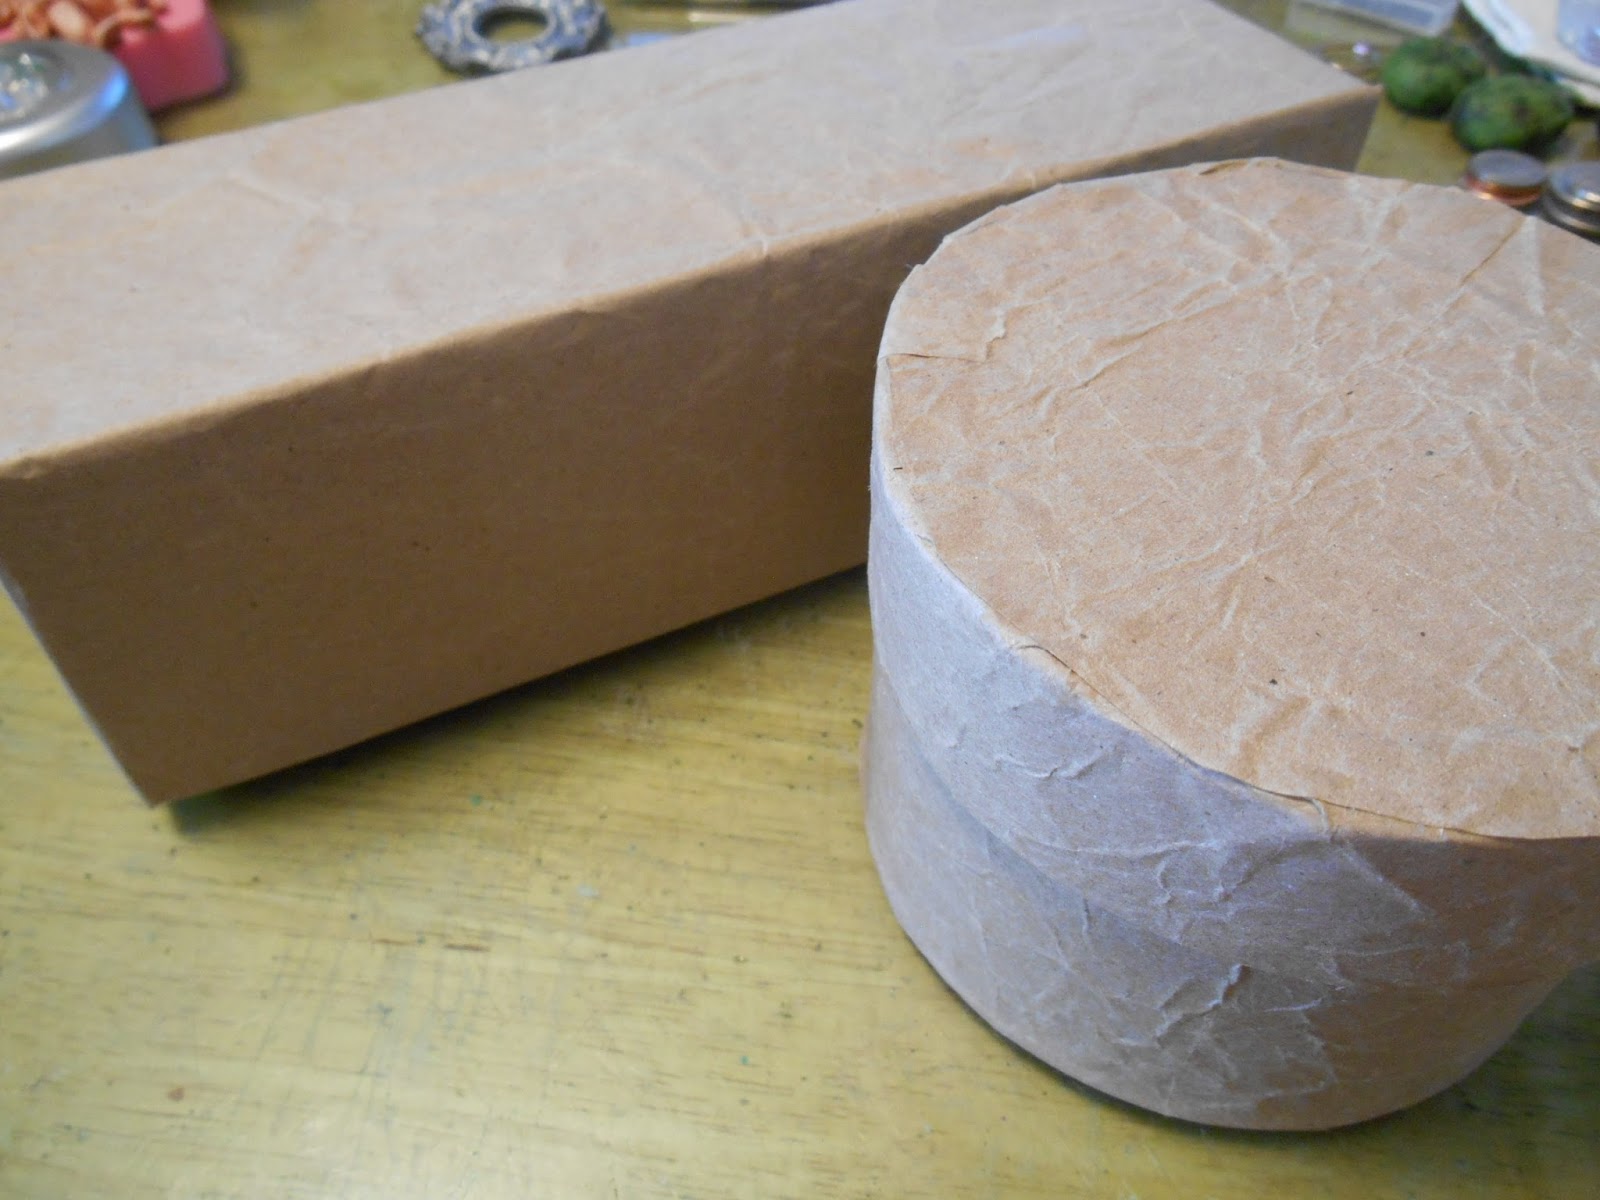
First of all it was created from a recycle processed cheese box...lol...I love to recycle cardboard boxes!
The first thing I did was to cover the box completely with brown craft paper, which I also recycled from other packaging. Glued it down with some matte medium and then let it dry for about an hour.
With some texture paste and a couple of stencils I added some texture to the background, I'm kind of crazy for texture...lol...and let it dry again for about an hour.
The I took one of those dollar bin frames from the craft store and a bunch of Amazing Casting Resin pieces from over pours(I have a lot of these in my stash) and glued them down also with the matte medium. After that dried I cover the whole thing with black gesso and again let it dry.
Now comes the fun part...I painted the entire piece with some metallic acrylic paints in blues and greens then after it dried I dry brushed on a bit of silver to bring up some of the details.
| Underwater Treasure (front) |
| Underwater Treasure (back) |
What are you dreaming of using Amazing Casting Products to recycle?
Well that's it for this post...Till Next Time!!!
As always you can find my work on my blog LynzCraftz , on YouTube LynzCraftz , as well as FaceBook LynzCraftz .
Labels:Arts & Crafts, polymer clay,Mixed Media,
acrylic paint,
metallic wax,
mixed media,
molds,
resin,
stencils,
texture paste
Tuesday, February 6, 2018
Crown Canvas Twinkling Starlight using Twinkling H2Os
Hello and welcome to the ColourArt Blog, I'm Lyn here with another post today this time working with the fabulous Twinkling H2Os! It had been years since I dabbled in watercolor before discovering the Twinkling H2Os and it has been a blast!
First I started off with this little crown canvas that I had in my stash and added a bit of texture paste through the Segmented Swirls stencil.
Then I added the stars through a handmade stencil that I just cut from chipboard.
I then added a little bit of Graphite Texture Paste and allowed everything to dry thoroughly. Now for the fun part...
Using the Twinkling H2Os
and some water to reconstitute them I began with the Ice color and
gradually got darker from there...using Moonbeams, Iris Petal and the
Twilight, darkening as I went out toward the edge allowing it to then
dry.
What do you think? These Twinkling H2Os are just gorgeous, they sparkle and shimmer for such a lovely effect! Gorgeous! Well that's it for today!
Labels:Arts & Crafts, polymer clay,Mixed Media,
cardboard,
mixed media,
resin,
stencils,
texture paste,
water color
Thursday, February 1, 2018
On the Wings of Love Mixed Media Altered Book
My oven finally arrived!!! Yeah...but now it needs calibrating which I've done the initial steps but it's still baking a little hot, so I've ordered a new oven thermometer just to check to make sure my old one is still working correctly...lol. It will be worth it in the end, I promise!
Meanwhile I'm still altering things...this time it's mini books. These books are 4x6 inch and came from I believe Oriental Trading Co. So I'm going to order some more of them since I received these in a swap years ago.
Now these little books are canvas covered so basically they are ready for altering. This one was already stamped with some script when I got it but that will get covered up. Then using a stencil by Prima "Damask" I believe with some modeling paste and allowing it to dry. Using some resin pieces from my stash(over pours from other projects)and a Relics and Artifacts face I simply glued them down with my hot glue gun. Now I can hear you all saying "not the hot glue gun, Lyn it wont hold" but since we'll be covering all this up with other mediums I'm not worried. It will hold just fine. Then I covered the whole thing with gesso and left it to dry.
Now I began to paint...first with some Silks Acrylics(any acrylic paints will work) in a few colors and then added some of the Graphite Texture Paste by Prima(I love this stuff) and again left it to dry.
Now for the fun part...I added a bit of Black watered down acrylic paint around the resin details and sprayed it with a little water and let it run. Once that dried I brought out the details with Metallic Luster by DecoArt in Silver Spark and Rose Gold. I love, love the way it turned out! Very Romantic I think. It's really so textured and I do love texture! WOW!
What do you think?
Well that's about it for today...Till Next Time!
As always you can find my work on my blog LynzCraftz , on YouTube LynzCraftz , as well as FaceBook LynzCraftz .
Labels:Arts & Crafts, polymer clay,Mixed Media,
acrylic paint,
book,
metallic wax,
mixed media,
molds,
resin
Wednesday, January 31, 2018
While I'm still waiting for my polymer clay oven to arrive(a replacement) I thought I'd share some of my Mixed Media Altered Art that I've been doing this year...
I started by covering a few recycled containers with Brown Paper, a couple of nut cans and a processed cheese box. I'll start with the nut cans...
This first one(I didn't get any pictures of the WIP) is a Steampunk Can, covered with Stencils and modeling paste and a bit of Graphite Paste by Prima, a few resin pieces from my stash and a few gears and cogs, painted with acrylic paints and finished off with some Metallic Luster by DecoArt.
The second one was done in much the same way... with one of my polymer clay "stones" on top, again with some resin pieces, an IOD Key Lock and a few rhinestones all painted with Metallic Acrylics and finished with Metallic Luster.
I'll save the Cheese Box to show later(it's a design team project). That's all for now but join me tomorrow for some Altered Mini Books!...Till Next Time!
I started by covering a few recycled containers with Brown Paper, a couple of nut cans and a processed cheese box. I'll start with the nut cans...
This first one(I didn't get any pictures of the WIP) is a Steampunk Can, covered with Stencils and modeling paste and a bit of Graphite Paste by Prima, a few resin pieces from my stash and a few gears and cogs, painted with acrylic paints and finished off with some Metallic Luster by DecoArt.
The second one was done in much the same way... with one of my polymer clay "stones" on top, again with some resin pieces, an IOD Key Lock and a few rhinestones all painted with Metallic Acrylics and finished with Metallic Luster.
I'll save the Cheese Box to show later(it's a design team project). That's all for now but join me tomorrow for some Altered Mini Books!...Till Next Time!
Labels:Arts & Crafts, polymer clay,Mixed Media,
acrylic paint,
metallic wax,
mixed media,
molds,
polymer clay,
resin
Wednesday, January 17, 2018
Welcome everyone, my name is Lyn and this is my first post as a designer for Colourarte! So happy to be here!
First
off I started with recycling a box from of all things "granola
bars"...First I covered the entire box with brown paper, then I started
to add texture with some stencils and some paper packing material from
my stash using a matte medium.
Once
dry I began adding some resin pieces also from my stash, some sand
texture paste and some micro beads again using matte medium.
Now this is where the fun happens...
I painted the whole thing with black gesso. Then once dry and using only 2 colors of Vivid Ultra Metallics, Peaceful Poppy and Mandarin Blush I brushed on 2 coats in random areas to cover the entire piece.
I finished it all off with some white acrylic paint, dry brushed on here and there to complete the look.
Labels:Arts & Crafts, polymer clay,Mixed Media,
acrylic paint,
mixed media,
molds,
resin,
stencils,
texture paste
Subscribe to:
Posts (Atom)